
This is the Horde. Below are our Recipes. Thanks for sharing our Kitchen
Showing posts with label Christmas cookies. Show all posts

Sunday, November 29, 2009

Eggnog Nutmeg Sugar Cookies


I decided I wanted to try a few new cookies this year. As we give about 90% of the cookies we make away as gifts, I wanted to add something new.


First up this year was the Eggnog Nutmeg Sugar Cookie. I usually buy the Better Homes and Gardens Christmas cookie magazine every year, and it didn't disappoint. I find one or two recipe that become a classic.

I find the icing on this one a smidgeon sweet so I may to play with it a bit for our own tastes. The recipe called for 3-4 tablespoons of eggnog in the icing. I increased it about 6 tablespoons for easier spreading and a thinner layer.

My daughter (aged 9) and spent the afternoon in the kitchen making these.

Ingredients

½ of a vanilla bean split in half lengthwise or 2 tsp vanilla (I used the seeds of the whole vanilla pod)

1 ¼ cups butter, softened

1 cup sugar

1 ½ tsp baking powder

1 tsp freshly grated nutmeg or ½ tsp ground nutmeg

½ tsp salt

1 egg

1 tbsp dairy or canned eggnog

3 ¼ cup all purpose flour

Eggnog Icing

Coarse sugar (optional)

  1. Using the tip of a sharp knife, scrape pulp from the vanilla bean pod and set aside. In a large bowl, beat butter with an electric mixer on medium to high for approx 30 seconds. Add sugar, baking powder, nutmeg and salt. Beat until combined, scraping bowl occasionally. Beat in egg, eggnog, and vanilla pulp or vanilla until well combined. Beat in the flour slowly until well combined. Divide dough in half. Cover and chill 1 hour.

  2. Preheat oven to 375 F. On a lightly floured surface, roll out one of the dough balls to ¼ inch thick. Using fluted round 3 inch cookie cutter, cut out dough. Place on cookie sheet lined with parchment paper ½ inch apart. Bake in preheated oven for approx 8 minutes or just lightly browned. Transfer to wire rack to cool. Spread cookies with Eggnog Icing and sprinkle with sugar if desired. Makes approx 24 cookies.

Where I deviated (as I always do). I used a whole pod of vanilla seeds, and I like my sugar cookies thin and smaller. I rolled mine a little thinner that ¼ inch, and found baking them for 5 ½ minutes PERFECT! Oven temps vary so keep an eye on them. My first batch I put in for 7 minutes and they nearly burned. I used a smaller cookie cutter about 2 inch diameter which yielded about 75 cookies.

Eggnog Icing. In a medium bowl, stir together 3 cups powdered icing sugar with ½ tsp vanilla. Stir in enough eggnog to make and icing of spreading consistency. The recipe called for 3-4 tablespoon of eggnog. I used approx 6 tablespoons.

To store: Layer cookies between sheets of waxed paper in an airtight container: cover. Store and room temperature for up to 3 days or freeze for up to 3 months.




Wednesday, November 18, 2009

Ultimate Sugar Cookie

This is a fantastic basic sugar cookie. They taste fabulous and are wonderful for decorating.

Sugar Cookie Base recipe
1 cup butter (softened)
1 cup Sugar
1 tsp baking powder
1/4 tsp salt
1 egg
1 tsp vanilla
2 1/4 cup flour
Beat butter on med-hi for 30 seconds or so. Add Sugar, baking powder, salt. Beat it up, add egg and vanilla until combined and smooth. Beat in flour until well combined.
Divide dough in half cover and refridgerate for 1-3 hours. Preheat oven to 375. Roll dough to 1/8/ or 1/4 inch (your preference) and place on ungreased cookie sheet.
I use parchment paper on my cookie sheets for these. (Almost forgot...when rolling the dough..make sure the surface is floured well, and the rolling pin. If you notice it starting to stick...sprinkle some more flour on the top of the dough and/or rolling pin.)
Bake for 8 minutes or edges are set. First batch I put in for 8, subsequent batches only 7 minutes.
ICING
3 cups icing sugar
2-3 tabls milk
1 tsp vanilla Combine in mixer.
Okay...here is where I deviated. That was wayyyy too thick, so I added milk a tablespoon at a time until it reached a consistency I liked. Added the food colouring. (gels/not the stuff from the grocer) and painted it on using cheap dollar store paint brushes. I use the gel based food colourings as it gives a much stronger colour. For the pink I only used one drop of red (and even that was a bit much...I didn't have any pink left). For the red it was only two or three drops, green two drops and such) For this one you can always use a Royal Icing as well. It's easy and dries hard 2 cups of icing sugar 3 tbsp of water That's it....good for painting or smoothing. I used this one for the gingerbread men but thinned it out a little more. (just add water a 1/2 tsp at a time until you get your consistency)

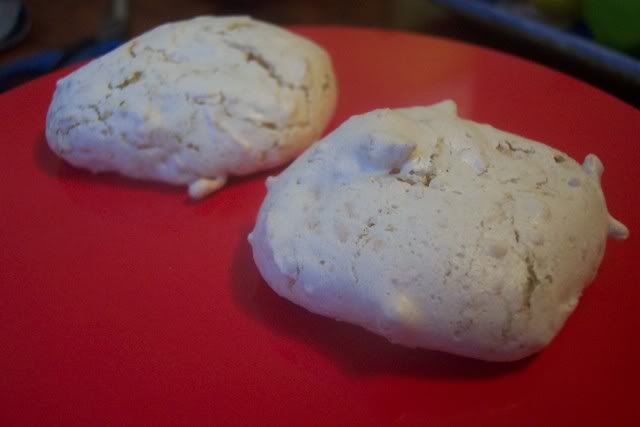
Coconut Rum Meringues with Lime


I made these as I had egg whites left over from the biscottis (vanilla ones...not the chocolate ones posted) and wanted to use them up.

You can substitute Ameretto for the rum and eliminate the lime for a different taste (really really good)

2 egg whites
1 tblsp coconut rum or 1/4 tsp coconut flavouring
1/2 tsp vanilla
1/4 tsp cream of tartar
2/3 cup sugar
1 cup flaked coconut
1 tsp finely shredded lime peel

Place egg whites in medium bowl...let stand at room temp for 30 min preheat oven to 300 degrees. Line two cookie sheets with parchment paper or foil..set aside Add coconut rum, vanilla, and cream of tartar to egg whites and beat with electric mixer on medium speed until soft peaks form. Gradually add the sugar beating on high speed until stiff peeks form.

Gently fold in coconut and lime Drop 1 inch mounds of coconut mixture from a teaspoon 1.5 inches apart onto prepared cookie sheets. Bake both sheets on seperate racks in oven about 10 minutes or mounds are set. Turn off oven and let cookies dry in oven with door closed for 30 minutes.

Makes about 36. Transfer to wire racks and let cool. Stor in airtight container at room temp for about a week or freeze up to 3 months.

Bittersweet Chocolate Hazelnut Biscotti - excellent


These are a fabulous recipe that have become a standard Christmas cookie in our house. I don't even like biscotti but this one is delish. Makes a wonderful homemade gift to anyone. I always package them up and include the recipe.


Bittersweet Chocolate Hazelnut Biscotti.
1/3 cup butter (softened)
2/3 cup packed brown sugar
2 tsp baking powder
1/2 tsp salt
2 eggs
1/4 cup unsweetened cocoa powder
1 2/3 cup flour
1 cup hazelnuts, toasted, chopped
4 oz bittersweet chocolate chopped

Chocolate dip
6 oz bittersweet chocolate chopped
2tsps shortening.

Preheat oven to 375 - lightly grease cookie sheet. (I generally always use Pam or parchement paper)

Beat butter on mdm/hi for 30 seconds, add brown sugar, baking powder, and salt. Beat until combined scraping side of bowl occasionally. Beat in eggs and cocoa powder and finally beat in the flour until well combined. Add in hazelnuts and chocolate pieces (4 oz) and mix well until thoroughly blended. Divide the dough in half.

On a floured surfave shape each into a roll (however long...around 9-10 inches) so they are about 1.5 inches in width. Place rolls 4 " apart on prepped cookie sheet for and slightly flatten the rolls so they are about 2 inches wide.

Bake for 20-25 minutes can cool on cookie sheet for 45 minutes. Reduce temp in oven to 300 Once cooled....cut each roll diagonally into 1/2" thick pieces. Cut carefully with a serrated knife. Place back on cookie sheet flat.

Bake at 300 for 8-10 minutes and then turn them all over and bake again for another 7-9 minutes until moisture is removed. Transfer to wire rack and cool for about an hour.

Dip Instructions.
You can use the microwave and melt the 6 oz of chocolate and shortening on 1/2 power for 1-2 minutes but I prefer to do it on the stove.

If you don't have a double boiler what I do is use a metal mixing bowl and small saucepan. Pop some water in the saucepan and place the metal mixing bowl on top. Turn on the element and get the water boiling in the saucepan with the metal bowl and chocolate pieces in place. Keep stirring until melted and combined with the shortening.

Dip the end of the biscotti into melted chocolate and place on waxed paper or parchment paper and let stand until it's well set.

Sunday, November 15, 2009

Colourful Peppermint Meringues


It's Christmas cookie time!! The kids and I always make all kinds of different cookies and make gifts of them for teachers, their agent, dance instructors, neighbours etc.


Picked up the Better Homes and Gardens Christmas Cookie edition again this year and found a few in there I'm testing this year. I have several from years ago that have become classics. I'm also inventing a new cookie. Working on it in my head and will experiment today as well.


Here is the first cookie tested this year. It's colourful and nice and light. I piped these out of an icing bag using a large star tip. The instructions say to bake at 200 F for 90 minutes. I placed 1/2 the batch in the oven and the other half in my convection oven at 225 F for 60 minutes. The convection oven ones turned out better (no browning or colour change at all)


Ingredients:

3 egg whites
1/4 tsp cream of tartar
1/4 tsp salt
1/4 tsp pure peppermint extract
3/4 cup sugar

Instructions

Preheat oven to 200F. Line a cookie sheet with parchment paper and set aside. In a large bowl combine egg whites, cream of tartar, salt and peppermint extract. Whip on medium high speed until soft peaks form. Slowly add the sugar (about a tablespoon at a time), beating on high until stiff peaks form.


With a small clean paintbrush, paint stipes of red food colouring paste on the inside of a large (18") icing bag. Using a large star tip on the end. Very carefully spoon the meringue into the bag. Pipe 2" stars onto prepared cookie sheets about 1 inch apart.


Bake in preheated oven for 90 minutes or until meringues appear dry and firm to a light touch. Transfer cookies to a wire rack to cool completely. I slide the parchment off the cookie sheet and onto the wire rack until the cookies are cool enough to remove without sticking, then let cool completely.


Store in layers seperated by waxed paper in an airtight container. Can be frozen up to 3 months.


Related Posts Plugin for WordPress, Blogger...