This is the Horde. Below are our Recipes. Thanks for sharing our Kitchen

Tuesday, June 30, 2009

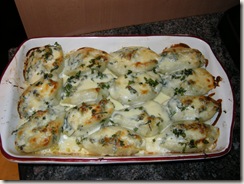
Pancetta Stuffed Shells with Asiago Cheese and Spinach

finished shells 017

Here is another one I found on the Everyday Italian. This one is absolutely spectacular!! It's not hard to make. About 1/2 hour prep and 1/2 hour baking. It is a very rich dish and a little goes a long way on the palette.

Another family favourite has been born from this recipe.

Pancetta Stuffed Shells

Ingredients

Shells:

1 (12oz) package jumbo shells pasta (I use 1 box Lancia)

2 tablespoons olive oil

½ lb thick cut pancetta (about ¾ inch cubes)

2 pounds frozen spinach, thawed and drained (I use about 2 packages)

1 (15 oz) container of whole milk ricotta

1 cup grated asiago cheese

½ tsp freshly ground black pepper

½ tsp ground nutmeg

Sauce:

1 tbsp butter

1 clove garlic, minced

1 cup cream

2 cups grated asiago cheese plus ¼ cup

¼ cup chopped parsley

¼ tsp freshly ground black pepper.

Instructions

Preheat the oven to 375 degrees F

For the shells:

Bring a large pot of salted water to a boil over high heat. Add the pasta and cook until tender but still firm to the bite, stirring occasionally, about 8 to 10 minutes. Drain Pasta.

Warm Olive oil in a large, heavy skillet over medium heat. Add the pancetta and cook until lightly golden, about 5 minutes. Remove the pancetta from the pan with a slotted spoon and transfer to a large bowl. Add the spinach, ricotta cheese, asiago cheese, pepper, and nutmeg. Stir to combine. Stuff the shells in a large, buttered baking dish. This recipe will fill this dish plus a small dish

Pancetta shells 002

Pancetta shells 001

For the sauce:

Melt the butter in a medium saucepan. Add the garlic and cook for 1 minute. Add the cream and bring to a simmer. Turn heat to very low and add the 2 cups of asiago cheese, parsley and pepper. Stir until the cheese is dissolved. Pour the sauce over the shells. Top with remaining ¼ cup asiago cheese. Here is an illustration of it ready to go in the oven. I have a small ladle that I spoon the sauce over each shell and then distribute until the sauce has been spread between the two dishes.
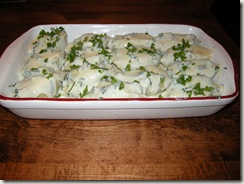
Pancetta shells 004

Bake until golden on top, about 25 minutes. Remove from the oven and serve.

pancetta 003

Sunday, June 28, 2009

Strawberry Margarita Frozen Pie


****Edited note. I tasted this today. It was delish. Light but filling. The 9"springform pan was perfect and this desert could easily serve 10-12.


A cool summer treat was in order today. I had an abundance of strawberries and wanted to do something different from the ordinary strawberry shortcake routine (which is always yummy and simple). I ended up making strawberry shortcake for the kids however as this recipe includes tequila.
I haven't actually tasted this one yet. I'll post my review of the flavours tomorrow (or later tonight if I can't resist a taste later into the night).

I found this recipe at Women's Day but changed it up a little bit as usual. It called for marscapone cheese but I substituted cream cheese as I had no marscapone kicking around and the grocer closes early on Sundays. Best part?? Only about 250 calories per serving based on 8 servings

Base/Crust
1 1/2 cups crushed pretzels
1/3 cup sugar
1/2 cup unsalted butter melted
Prepare crust in a food processor. Pulse the pretzels until they are crumbs, add sugar and pulse once or twice. Slowly pour the melted butter into the processor and pulse a few times while pouring until well combined. Place in a greased 10" pie shell or springform pan. Refrigerate while preparing the next step.

Filling:
1 container (16 oz) strawberries, hulled and sliced.
2 tsp sugar
1 can eagle brand condensed (not evaporated) milk, chilled. (For Canadian measurement use 1 and 1/3 can of eagle brand (410ml)
8 ounces cream cheese
1/3 cup plus 2 tsp tequila
1 tbsp lime zest
2 tbsp lime juice
1 cup prepared whipping cream
To prepare filling. Puree the strawberries keeping 3/4 cup of thinly sliced strawberries with sugar separate and put aside.

Once pureed in either a food processor or mixer add cream cheese and combine until smooth. Add the condensed milk, mix until smooth. Add tequila, lime zest and lime juice, continue to mix until smooth. Fold in the strawberries you put aside. Fold in the whip cream until combined.
Pour into pie shell or springform pan and place in the freezer uncovered for 4 hours. Cover airtight for another 2 hours. Garnish with strawberries and lime. Remove from freezer and place in the fridge for about 15 minutes prior to serving for easier cutting.

Saturday, June 27, 2009

Steak Diane


This recipe has become a massive favorite in our home. I have changed it slightly to account for budget and a large family. In general. I triple this recipe for our family. I also use thin steak slice cutlets. I can easily feed our family for under $20 for the entire meal using the thin steaks and while using tenderloin is delicious, so is it's less expensive counterpart.


I found this recipe in my South Beach Recipe book and not only is it delicious, it is heart healthy. Using the recipe as stated with tenderloin the nutritional at a glance is as follows.


Per serving: 397 calories, 21g fat, 5g saturated fat, 32g protein, 28g carbohydrate, 7g dietary fiber, 43mg cholesterol, 266 mg sodium.


Ingredients

4 center cut beef tenderloin medallions
Salt
Coarsely ground black pepper
1/4 cup 1 tablespoon margarine
1/4 cup finely chopped shallots
1/4 cup mushroom caps sliced 1/8" thick (I always go heavier on the mushrooms, at least a cup worth even when I don't increase the recipe for family)
1/8 teaspoon minced garlic (I use 1/4tsp)
1 teaspoon dry mustard powder
1 tablespoon Worcestershire sauce
2 tablespoons lemon juice
2 tablespoons chopped parsley
1 tablespoon fresh chives

Pound the steaks until they reach approx 1/2" thick. Dry with paper towel and sprinkle with salt and pepper (I omit the salt)

In a large chafing dish over medium heat, melt 3 tablespoons of the margarine. Increase the heat to medium-high and cook each steak for two minutes on each side. Remove to plate.

Melt remaining 2 tablespoons margarine. Add the shallots, mushrooms, garlic and cook, stirring for 1 minute. Whisk the worcestershire sauce and mustard together and add to the mixture, ensuring it's well combined. Return the steaks to the pan and cook until desired doneness. Place the steaks on warm serving plates. Add the lemon juice, parsley and chives to the pan and mix thoroughly. Cook for 30 seconds or until just warm. Pour the sauce evenly over the steaks.

This meal is very easy to make and can be ready in as little as 15 minutes when using the thin steaks. Add perhaps another 5-10 for tenderloin. It is a definate keeper!!! I usually return my thin steaks to the pan after I've added the lemon juice, chives and parsley. I'll simmer it for a minute or two to let the flavour infuse fully.

Thursday, June 25, 2009

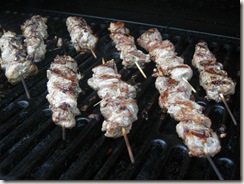
Lamb Souvlaki

016

I love Lamb Souvlaki. I`ve not yet found a fantastic recipe that makes me think I`m sitting on the Danforth but this one has sufficed in our family. It`s quite good. The secret is to let the meat marinate for several hours in the fridge to allow the flavours to infuse into the meat. I don`t really measure this so I`m kind of winging it here.

Ingredients.

1 Leg of Lamb Roast
1/4 cup lemon juice
1/8 cup apple cider vinegar
1/4 cup extra virgin olive oil
1 Shallot, finely diced
1-2 cloves of finely diced garlic
1 tablespoon Greek oregano
1 tablespoon rosemary

Trim excess fat from the lamb roast and cut the lamb into 1 1/2 inch – 2 inch cubes. Place in an airtight container and mix in all the other ingredients. Mix well and cover. Place in the fridge for several hours (about 5-6). Heat up the bbq and grill turning periodically for approx 10-15 minutes until meat.

Serve with rice and vegetables with Tzatziki on the side for dipping. MMMMM

Wednesday, June 24, 2009

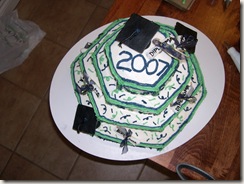
Graduation Cake 2009


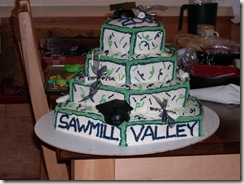
Today is my son's graduation from Middle school. Plans for this cake went somewhat sideways and we lost power for several hours. So much for more fondant to embellish it.

I don't do the parent volunteer thing at school so my contribution is baking.

This cake is a red velvet cake with cream cheese icing. Hats and scrolls were made from the remainder of fondant from the cell phone cake on Monday. A bit quick of an icing job but I'm really pressed for time on this one.


Monday, June 22, 2009

I Was supposed to make a wicked cool cake today. Chocolate Mayonnaise Cake


That didn't happen. I did make a cake, but not the one intended.

Today is my son's 14th birthday. I was supposed to make a really neat cake with a watchtower and dead trees from the video game Oblivion. I had it all planned out.

As all things in life, somethings don't go as planned. To see the events that transpired feel free to visit my main blog, but it runs quickly like this.

My son got a cell phone a few months ago as an early birthday and grad gift. He wiped out last week and killed his phone. Can't be mad at that, it was a complete accident and I was more concerned about his injuries. We gave him our other son's old phone and reactivated it under his number. He was disappointed he broke his phone but happy to have anything even though it wasn't as fancy or anything.

Last night he lost his phone. It fell out of his pocket at the theatre where my daughter was performing. He was beside himself but also knew he was on the hook for this one. Today we were going into his birthday with no present and no phone!!!

I called security and the box office this morning and his phone was turned in. The twisted side of me decided it would be funny to switch the Oblivion cake to a cell phone cake. Being the big meanie that I am I quickly whipped together a cell phone design...piped in Don't Break Me, Don't Lose Me, on the sides. It was funny. So instead of this really cool cake I planned we got a mediocre cell phone. It may look mediocre but dang it's good!!

My grandmother used to make this recipe and said it was from the depression when eggs and milk were at shortage. (Why mayonnaisse was available with an egg shortage is still a mystery to me). This is a delightfully moist flavourful cake however and it was one of my favorites growing up. Easy peasy to make.

Chocolate Mayonnaise Cake

2 cups all purpose flour
1 cup white sugar
4 tbsp sifted cocoa

2 tsp soda
1 cup cold water
1 cup mayonnaise (or salad drsg) (I use 1/2 the fat Hellmans and it still works great)
1 tsp vanilla

1. Cream mayo, sugar, water & vanilla together.
2. In a separate bowl, sift flour, cocoa and baking soda.
3. Gradually add mayonnaise mixture to flour mixture.
4. Beat well.
5. Pour into a greased 8” or 9” square cake pan.
6. Bake at 350F for 45 to 50 minutes.


Ice with a regular buttercream icing. The cake is not too sweet and a dense moist delight. I used marshmallow fondant for the numbers and screen. It's a simple cake but I was under the gun so not as well planned as others.
By the way...my son was delighted when he unwrapped his new old phone after I retreived it from the box office this evening.

Friday, June 19, 2009

Roman Chicken

DSCN2657
I haven't made too many brand new entrees this week so decided tonight to try another one off the Food Network. I knew ingredients I had on hand and landed once again on Giada DeLaurentis' recipe. So far we have batted 100 on anything I've made from her. My husband just bought me her first cookbook, so I made the entree from the website and the side dish from the book "Everyday Italian".

The entree turned out very well. The combination of flavours was excellent. A light dish. I made it with wild mushroom risotto on the side. I think next time I will do this with some plain rice. Both dishes were excellent but I think a simple risotto or plain rice would be better. The blending of fresh herbs, tomato and capers with the chicken was refreshing on the palatte.

An easy recipe to make in about 40 minutes. For the record I eliminated the chicken stock from this recipe, and didn't miss it. I also used boneless chicken breasts as I already had it in the fridge. A final change was I simmered uncovered to allow the liquids to reduce a little better.

Ingredients
4 skinless chicken breast halves, with ribs
2 skinless chicken thighs, with bones
1/2 teaspoon salt, plus 1 teaspoon
1/2 teaspoon freshly ground black pepper, plus 1 teaspoon
1/4 cup olive oil
1 red bell pepper, sliced
1 yellow bell pepper, sliced
3 ounces prosciutto, chopped
2 cloves garlic, chopped
1 (15-ounce) can diced tomatoes
1/2 cup white wine
1 tablespoon fresh thyme leaves
1 teaspoon fresh oregano leaves
1/2 cup chicken stock
2 tablespoons capers
1/4 cup chopped fresh flat-leaf parsley leaves
Directions
Season the chicken with 1/2 teaspoon salt and 1/2 teaspoon pepper. In a heavy, large skillet, heat the olive oil over medium heat. When the oil is hot, cook the chicken until browned on both sides. Remove from the pan and set aside.
Keeping the same pan over medium heat, add the peppers and prosciutto and cook until the peppers have browned and the prosciutto is crisp, about 5 minutes. Add the garlic and cook for 1 minute. Add the tomatoes, wine, and herbs. Using a wooden spoon, scrape the browned bits off the bottom of the pan. Return the chicken to the pan, add the stock, and bring the mixture to a boil. Reduce the heat and simmer, covered, until the chicken is cooked through, about 20 to 30 minutes.
If serving immediately, add the capers and the parsley. Stir to combine and serve. If making ahead of time, transfer the chicken and sauce to a storage container, cool, and refrigerate. The next day, reheat the chicken to a simmer over medium heat. Stir in the capers and the parsley and serve.
Wednesday, June 17, 2009

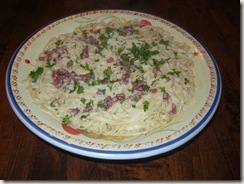
Amazing Alfredo Recipe

alfredo 005

Sorry I missed adding any recipes yesterday. It's not that I didn't bake or cook but life took over.

Today I will share a wonderful recipe for Alfredo. Finding a perfect Alfredo Recipe is not the easiest thing. I rarely order it in a restaurant because I'm amazed at how badly they can screw up something that is actually quite easy to make. Forget any type of chain restaurant for a decent alfredo. I had the best alfredo sauces of my life in Italy a few years ago. Oh...Italy...heaven on the tastebuds I tell you. We only had one unsatisfactory Italian meal. One trattoria was so good in Florence we ended up going back over and over again. (I have yet to pry the recipe for the pesto from the owner's hands..still trying though)

Seeing as I come from an Italian background, it's rather shocking that I didn't experience more variety in our Italian dishes. I'm willing to give my mom a pass on this though because she is not Italian.

This recipe is what I use for my base of alfredo. I will add cubed fried pancetta to it for some spiciness, or cubed ham, sometimes I'll add prosciutto to it. Whatever strikes my fancy. I think our favorite is with Pancetta though. (Italian bacon) Even if you don't add any extras to it and simply love plain alfredo, this is a fantastic recipe and simple to make.

Be sure to use real ingredients. Do not substitute half and half for cream, or margarine. If you are going to enjoy an artery clogging indulgence do it with gusto!!

Ingredients:
1 cup heavy cream (whipping cream)
2 cups Parmesan Cheese, grated (I use more actually, about 2.5)
1 stick butter, unsalted (1/2 cup)
2 tbsps chopped garlic (I use preminced garlic from a jar, otherwise I would be endlessly chopping garlic)
Salt and fresh ground black peppercorns to taste.

Fresh chopped parsley for garnish

Melt the butter in a medium saucepan over low heat. Add the garlic and slowly pour the cream into the pan. Stirring constantly, bring the heat up just a little and continue to stir until it reaches a slow boil. Let it reduce a little bit (about two minutes or so), slowly add the parmesan cheese until melted and combined. Reduce heat and simmer for a few minutes until it gets a little thicker. Add salt and pepper to taste.
Pour over your favorite pasta.

If adding pancetta or prosciutto: Heat skillet on the stove with approx. 1 tbsp olive oil. Add cubed pancetta and saute until cooked and a little crispy. Add to the prepared sauce.See Picture


If adding diced ham. Just toss it in once the sauce is prepared until heated.

I love this sauce plain over seafood medallions, or cheese ravioli. It's always delish over penne, linguine, etc with the added pancetta or ham. I've been known to toss in some streamed brocolli and peas into the pasta as well on occasion.

Enjoy!!!

Tuesday, June 16, 2009

Warm and Comforting Fresh Berry Crisp

Rhubarb, Apple, Blackberry, Raspberry, Blueberry Crumble/Crisp

apple rhubarb crisp 004

I was looking in the fridge and trying to decide what to make for a treat today. I raided my mother in law's garden on Saturday and cleared her rhubarb. She is here visiting with us for a month and I certainly didn't want to see all that lovely rhubarb go to waste. Originally I was going to make some strawberry/rhubarb jam but then saw all of these other ingredients kicking around my kitchen and decided to combine them all.

The result is a mouth-watering, comforting warm treat. One of those that makes you feel like your a little kid in grandma's kitchen type of recipes. I did my best to actually measure while I came up with this (sort of). I used fresh apples and rhubarb, and frozen blackberries, blueberries, and raspberries..I have a huge bag from Costco in the freezer all the time)

Ingredients:

Approximately 4 baking apples Peeled and cut into small cubes (I used Macintosh, but any good baking apple will do)

1 Granny Smith apple, peeled and cubed

1 cup blackberries

1 cup raspberries

1 1/2 cup rhubarb, cut into small cubes

1 cup blueberries

1/2 tsp cinnamon

1/8 tsp nutmeg

1/2 cup all purpose flour

1/4 cup brown sugar

approx 1/4 cup white refined sugar

Topping

1 1/2 stick unsalted butter

1 1/2 cup plus approx 1/4th cup all purpose flour

1/2 cup crumbled pecans (coarse)

1/2 tsp salt (approx, I used a little less)

1/2 tsp cinnamon

Combine all the fruit in a large mixing bowl. Add the flour and the dry ingredients. Combine well so all the fruit is coated. Pour into a prepared 9 x12 baking pan. (I use parchment paper to line the bottom).

For the topping: Cut the butter into small cubes and let it soften just a little. Add in the dry ingredients and cut with forks until well blended. You may need to add a little flour to achieve a coarse texture, and ensure the butter is well combined with the dry ingredients. I'll be honest. I use my fingers to mix it up properly...something to be said about doing it old school.

Spread the crumble over the fruit in the pan and bake for 45 minutes at 350 degrees Fahrenheit, increase temp to 375 degrees and bake for 10 minutes or until the topping is golden brown.

If you can stand the wait. Remove from oven and set to cool and set for approx 10 minutes. If you can't stand to wait (like my family),... it's just as yummy with the juices a little runny.

Serve with a dollop of vanilla ice-cream and enjoy this mildly tart but sweet combination of flavours.

apple rhubarb crisp 001

Monday, June 15, 2009

Creamy Key Lime Pie


One thing about traveling is you experience local flavours in cuisine. One of my favourite culinary taste sensations came from a trip to Florida where we tasted Key Lime Pie for the first time. A little diner called Nellie's in Springhill is where we found this gem.

My entire family loved key lime pie and after coconut cream pie adventure the other day my son and husband wanted me to try a key lime pie.

I surfed recipes online and settled on one that I think is the closest to what I was looking for. Thank you Kelly at Recipezaar for sharing this recipe. It's easy peasy to make and delicious. I added a little lime zest into the recipe as well and made it in a 10" springfoam pan. A regular pie pan would suffice as well.

Ingredients
6 egg yolks
2 cans condensed milk (I use Eagle Brand)
1 cup fresh squeezed key lime juice (or bottled, I used fresh and it was about 7 limes)
whipping cream (sweetened)
lime for garnish

Directions:
Gently whisk the egg yolks until smooth. Add the two cans of condensed milk and continue whisking slowly to combine well.
Slowly add the lime juice, again, whisking slowly until thoroughly combined.
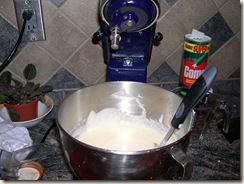
I used the low setting on my kitchenaid mixer to combine the above.

Prepare your shell using 1 1/4 cup graham cracker crumbs with 1/4 cup of butter and 1/4 cup sugar. As mentioned I used a springfoam pan, but you can use a premade graham pie shell from the grocer as well.

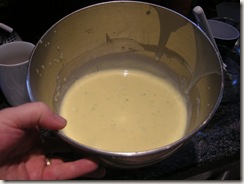
Once well combined (see picture below), place in a preheated oven of 325 degrees Fahrenheit for about 40-45 minutes. Remove from the oven and place in the fridge for 4-6 hours and top with whipping cream.

It's tangy and sweet at the same time. The texture is fabulous and it's definitely a keeper here. Ridiculously easy to make.
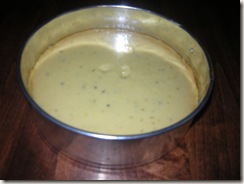
Filling before baking
Key Lime Pie filling 002
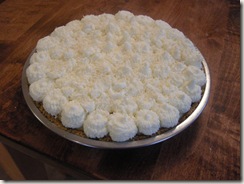
This is the pie baked (excuse the fingermarks courtesy of our 7 year old)
Key lime baked 001
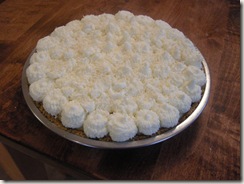
Now with whip cream

Sunday, June 14, 2009

Chicken Florentine

My husband found me Giada De Laurentiis's cookbook Everyday Italian today. Whilst hanging out in William Sonoma he also saw Margarita mix, which made him flashback to our trip to Mexico and he couldn't resist. I have been drinking margarita's for about two hours prior to attempting this recipe.
I am typing this while attempting this recipe. It says it should only be 20 minutes prep time but truth be told. I'm at that already and the chicken is still in the skillet. I am doubling the recipe as well as the size of our family warrants it. I did have to skip out to the store to get some more wine which forced me to call my 16 year old son up to drive me over as the margaritas have left me incapable of that little feat. He is giggling away at him mommy who never drinks.

So here we are.. (spellcheck is definitely going to be used for this one!!) This recipe source Is Giada De Laurentiis. Everyday Italian on the Food Network.

Ingredients

  • 4 boneless skinless chicken breasts
  • Salt and freshly ground black pepper
  • All-purpose flour, for dredging
  • 6 tablespoons (3/4 stick) unsalted butter
  • 2 tablespoons shallots, sliced
  • 1 tablespoon chopped garlic
  • 1 1/2 cups dry white wine
  • 1 cup whipping cream
  • 1 tablespoon chopped fresh Italian parsley
  • 2 (10-ounce) packages frozen cut-leaf spinach, thawed, drained

Directions

Sprinkle the chicken with salt and pepper. Dredge the chicken in the flour to coat lightly. Shake off any excess flour. Melt 2 tablespoons of butter in a heavy large skillet over medium heat. Add the chicken and cook until brown, about 5 minutes per side. Transfer the chicken to a plate and tent with foil to keep it warm.
Melt 2 tablespoons of butter in the same skillet over medium heat. Add the shallots and garlic and saute until the shallots are translucent, stirring to scrape up any browned bits on the bottom of the skillet, about 1 minute. Add the wine. Increase the heat to medium-high and boil until the liquid is reduced by half, about 3 minutes. Add the cream and boil until the sauce reduces by half, stirring often, about 3 minutes. Stir in the parsley. Season the sauce, to taste, with salt and pepper. Add the chicken and any accumulated juices to the sauce, and turn the chicken to coat in the sauce.
Meanwhile, melt the remaining 2 tablespoons of butter in another large skillet over medium heat. Add the spinach and saute until heated through. Season the spinach, to taste, with salt and pepper. Arrange the spinach over a platter. Place the chicken atop the spinach. Pour the sauce over and serve.
Was it close to 20 minutes? Evaluation


Fast forwarding to and hour later. This recipe was quite good. There are a few things to remember while making it. Most importantly is that you really need to let the sauce simmer down and reduce. I followed the 3 minutes as per directions and it really hadn't reduced much. I added another 6 minutes and served. While it was tasty, it wasn't nearly as tasty as the chicken and sauce I left on the stove for another 10 minutes or so. THAT was delicious. The flavours were all beautifully melded by then and very very good. So keep in Mind...be sure to really let it reduce before serving. I served it over a bed of linguine, placed the spinach, topped it with the chicken and a small ladle of sauce. I did top with more fresh ground pepper and parmigiana cheese.

Will I make it again? I'm not sure. It was tasty but not one I'd call an instant favorite.
For the photos.
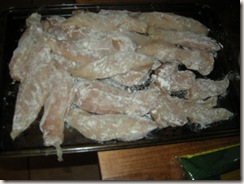
The chicken coated with flour, salt and pepper.
029

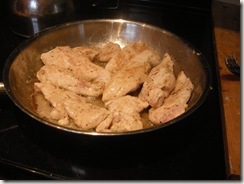
Chicken being sauteed in pan

030

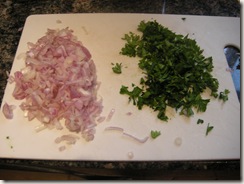
Shallots and parsley

028

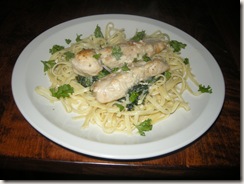
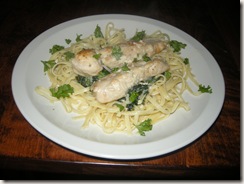
Finished Dish
033

Thursday, June 11, 2009

Ravioli Caprese


One of my favorite shows on television is Everyday Italian on the Food Network. I have tried so many of Giada's recipes and all have turned out fabulously. This one in particular is excellent. It's very light tasting but filling at the same time. I have trouble finding it on the food network site so I've taken notes from my pvr.

This recipe is not a 30 minute meal by any stretch. Preparing the raviolis take time. I can usually whip them off from start to finish in about an hour. Well worth the time though. My kids love it and I certainly can't complain. One of my favorite salads is Caprese salad so this just seems appropriate.

I don't have a picture of this one as I haven't made it for a couple of months but will take one and add it next time I make it. (Probably next week)

Dough:
2 1/2 cups all purpose flour, plus extra for dusting
1 cup very hot water.

Filling:
3/4 cup whole milk ricotta
1 egg
1/2 cup finely shredded store bought rotisserie chicken
1/4 cup grated parmesan
2 tblsp finely chopped fresh basil leaves
1/2 tsp salt
1/4 tsp freshly ground black pepper

Sauce:
3 tablespoons extra virgin olive oil
3 tablespoons chopped fresh basil leaves
2 tsp grated lemon zest
1/2 tsp salt
1/4 tsp freshly ground black pepper

For the dough:
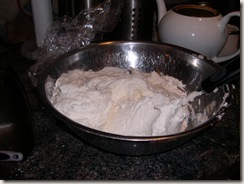
In a large bowl combine the flour and water. Using a wooden spoon, stir to combine into a large ball. Cover with plastic wrap and let sit for about 10 minutes. * I toss the flour into my kitchenaid mixer and using the dough hook start adding water. It's easier.

For the filling.
Combine all the ingredients in a medium bowl and stir to combine. (I use a food processor to shred the chicken then mix the rest of the ingredients in with a mixing blade)

To form the ravioli. cut the dough into 4 evenly sized pieces. It should be slightly sticky. Add extra flour as necessary for rolling, but only use a little bit as needed. Form each piece into a 2 by inch rectangle. Recover the dough with the plastic wrap.  You can also use a ravioli mold.  I picked one up at a gadget store. 

Lightly dust the work surface and a rolling pin. Working with 1 piece of dough at a time, roll the dough into a 4 x 19 inch rectangle. Place 9 rounded teaspoons of filling about 1 inch apart down the center of the dough. Fold the dough over the filling. Press down around the edges of each of the ravioli with your fingertips. Cut the ravioli into small squares and press down around the edges again to seal. Place on a lightly floured baking tray and continue until you've exhausted the mixture.

Bring a large pot of salted water to a boil over high heat. Add half the ravioli and cook until the ravioli float, stirring occasionally for about 3-4 minutes. Drain into a large bowl and cook the remaining ravioli. Pour the olive oil over the cooked ravioli, add the basil, lemon zest, salt and pepper. Gently toss the pasta to coat and serve immediately.

If you take the time to prepare this recipe you will not be disappointed. It is lovely. The combination of the lemon and the basil and salt is reminiscent of sitting at an oceanside trattoria in Italy. Truly delightful.

Tuesday, June 9, 2009

Amaretto Almond Cupcakes


This is a delightful cupcake recipe we tried a few months back. They are moist and flavourful. As usual I do make alterations to recipes after a first go and gave it my own twist. Since making this original recipe found at Canadian Living: Almond Cupcakes, I have changed once again, a few items.

Ingredients:
1/2 cup butter,softened
1 cup granulated sugar
2 eggs
1/2 tsp almond extract (plus 1 tsp Amaretto Liquer)
1 cup all-purpose flour
1/2 cup ground almonds
1 tsp baking powder
1/4 tsp salt
1/2 cup milk (I substituted buttermilk)

Preparation:
In large bowl, beat butter with sugar until fluffy; beat in eggs, 1 at a time. Beat in almond extract and amaretto. In separate bowl, whisk together flour, ground almonds, baking powder and salt, stir into butter mixture alternately with milk, making 3 additions of dry ingredients and 2 of milk. Spoon into paper-lined or greased muffin cups. Bake in 350°F (180°C) oven until cake tester inserted in centre comes out clean, 20 to 25 minutes. Transfer to rack; let cool.

I iced them with Buttercream Icing infused with Amaretto. (A basic Buttercream can also be found on the Canadian Living site. My recipe is very similar with a few differences.

ButterCream flavoured Ameretto Icing
3/4 cup butter (room temperature)
3 cups icing sugar (confectioner's sugar)
1-2 tablespoons cream (I use whipping cream or 18% coffee cream, half/half)
2 tsp Ameretto
1/2 tsp almond extract


Whip the butter until fluffy, slowly add 1 cup icing sugar until well blended. Add the Ameretto, and almond extract and whip well. Continue adding the icing sugar, alternating 1/2 cup at a time with a little cream, until fully blended. Continue whipping on high speed for another minute or so and ice the cupcakes once they have completely cooled. Top with a piece of sliced almond.

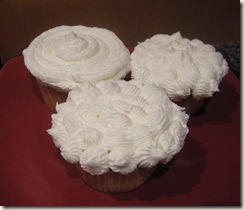
003
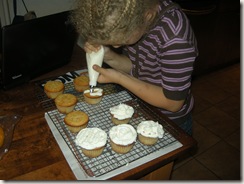
My lovely daughter learning the ropes.

This post can not be completed without thanking my friend Todd, who left a comment on my status one day about adding amaretto to my almond muffins. Thanks Todd!!!

Monday, June 8, 2009

Coconut Cream Pie

005
I have a serious addiction to coconut cream pie. Key Lime pie is up there as well, but coconut cream pie is my downfall.

I've never actually made one before as I generally only indulge when we order chicken from Swiss Chalet (which is rarely).

I had a real hankering one night after online chatting with a friend, who was in the middle of making one. It was one of those had to have, need to have right now kind of cravings. I didn't have anything available to make one, the stores were all closed so I suffered.

Trying to find a good coconut cream pie in a grocery store is not an easy task so I decided to make one.

I looked at a few recipes online and decided to try one. It turned out alright but the filling was somewhat runny. I made some changes to the recipe and the following is my improved recipe.

This one is pretty good on the coconut cream scale. I may tinker some more or if anyone has any suggestions to improve this one I'll gladly accept but all in all, quite simple to make and very tasty.

Edited to add some details after watching my pretty coconut cream pie disappear in record time tonight. The changes I made were killer!!! Even husband who is not a big fan of coconut said it was absolutely delish!! YAY me. I had a slice and will admit...it was good...very very good.

Ingredients:
1 can coconut milk
approx 1 1/2 cups half-and-half
2 eggs plus one egg yolk
3/4 cup white sugar
1/2 cup cornstarch
1/4 teaspoon salt
1 cup flaked coconut, toasted
1 teaspoon vanilla extract

Crust:
1 1/4 cup graham cracker crumbs
1/4 cup butter

Topping:
1-2 cups real whipped cream

Directions:
Pour coconut milk into a large measuring cup. Add half and half until you reach the 3 cup mark. Add the eggs and egg yolk and mix well.

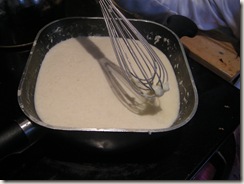
Pour into a medium saucepan and add sugar, cornstarch, salt. Whisk this mixture completely until totally smooth. (I take some of the milk/half and half and combine with the cornstarch in a seperate bowl until smooth and add it to the saucepan to ensure no lumps.

Bring to a boil over low/medium heat stirring constantly and remove from heat when boiled or getting thick.

Add the coconut flakes, and vanilla, combine well.

Pour into prepared pie shell and cool for 2-4 hours until set.

Top with whip cream and sprinkle additional flaked coconut on top.

I pipe the whip cream on with a large tip on the icing bag just to make it look pretty.

For the crust: Combine graham crumbs with melted butter and press onto the bottom of a 9 inch pie plate. Refrigerate of put aside until you need it.

This has instantly become a family favorite. (My daughter is off school today and busy stirring the mixture in the kitchen while I type this) If you filling gets lumpy while on the stove whisk it well. One thing we have done in the past is take the handblender to it to before adding the coconut flakes and pouring into the prepared shell to ensure a smooth filling.


Here you see the mixture warming on the stove (Ignore my plank of wood, we had a piece of granite fall off the endcap, so this is my temporary solution until the granite comes in.002

Once it’s thickened you pour it into your prepared shell

003

Once it has cooled for a couple of hours, top with whip cream, and sprinkle some more coconut on it.

005

My husband and oldest son have just requested I attempt a key lime pie next time. Perhaps that will be the goal next week. ….. in the meantime I need to finish preparing dinner, and make some Ameretto Almond Cupcakes.

Friday, June 5, 2009

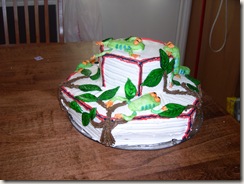
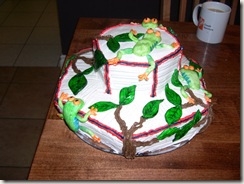
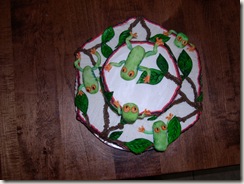
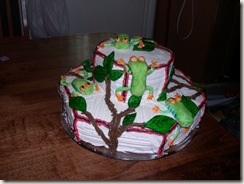
How to Make a Tree Frog Cake

treefrog cake

The Tree Frog cake became an instant classic in our house (and neighbourhood). I was in heavy cake mode that week. I had agreed to make a grad cake for the school for gr.6 graduation, and my son's birthday was the same week. We did double duty. The grad cake was my first attempt at a multilayer cake and seeing as how I don't have those fancy cake dowels and platform things I had to improvise. I used plastic plates and wooden dowels wrapped in saran wrap. Here is the grad cake. (It's a little lobsided but not bad)

DSCN3861 DSCN3860

The scrolls and hats are made from marshmallow fondant found in This recipe for a ladybug cake.

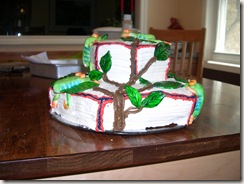
Using the same hexagon pans we decided to try the Tree Frog cake. My son adores frogs, any frogs but especially tree frogs. He takes sheer delight in catching them at the cottage. I decided for his 12th birthday to make the Tree Frog Cake. I saw some pics of different tree frog cakes online and played with the concepts of what I would do. The inspiration for this one came from one I think I found on the Wilton's Cake decorating forum.

This cake is pretty labour intensive but so worth it if you are looking for some WOW factor or just fun with the kids for a couple of days.

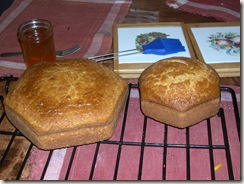
We begin with a basic white cake. Use any recipe you desire. Given the time constraints that week I used box cakes but added a package of pudding to each mix, also replacing the water with buttermilk. I used the Wilton's Medium and extra small hexagon pans for this cake. They come in a set of four, so I used the smallest and the second largest one. Be sure to spray the pans very well with Pam spray before baking to ensure easy release.
DSCN3828 DSCN3825

While the cakes are still a little warm. Slice the tops off the cakes to make a flat surface. Take a jar of apple jelly or apricot jelly and put into the microwave for approx 1-2 minutes or until it has turned to liquid. Be careful removing it as it will be hot. Brush the liquified jelly over the cakes generously to seal the crumbs as well as the moisture in the cake. Let cool completely. I brush the jelly over the entire cake (including underside). Alternatively you can wait until the cake is completely cooled and place a thin layer of buttercream icing over the two cakes, cool for half an hour and finish icing after that. This is all just to seal the crumbs to ensure a nice finish.

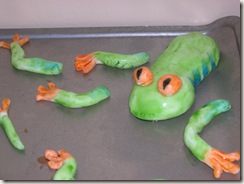
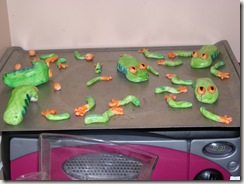
This part now you should begin the day ahead. Make the marshmallow fondant linked above. Mold your frog bodies, arms, legs, and eyeballs. Let them dry completely overnight and paint them with food colouring in the morning. I use Spectra food colouring gel. To paint these I take a drop mix in some water and play.
You will also need to roll out your fondant and cut out leaf shapes to paint as well. Often if I need alot of one colour fondant I'll mix some colouring in while I'm making it. Alternatively you can use some ready made fondants. Personally, I'm not a big fan of fondant flavour but the marshmallow one (according to my kids) tastes like oreo cookie cream. It's really easy to work with. Below you see our frog bits in pieces drying on the cookie sheets. I suppose if you were to use ready made you could probably mold/paint and place all on the same day, but this is the route we took.

DSCN3820DSCN3822

Now you are ready for the cake assembly. Ice with your favorite buttercream icing, and ensure you have a little bit left to do the piping for the trees and edges if you desire. Using a regular round tip and icing bag pipe the trees on and add the leaves as you go along.

DSCN3833DSCN3864

Play with your frogs until you find some patterns you like. The nice part of this is you place the arms and legs
wherever you and they will stay with the buttercream below.

DSCN3865DSCN3867

DSCN3870

After it's all finished take lots of pics and wow the kids with this fun creation. Yes it does take time but it's a wicked cool cake. If you do make any of the cakes I’ve written instructions for I’d love to see pics of them. Email them to me and I’ll post them on the blogs.

DSCN3868DSCN3871


DSCN3869

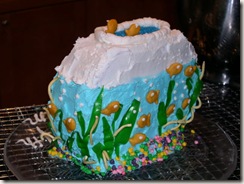
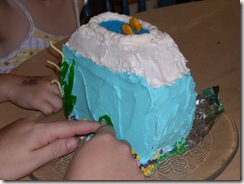
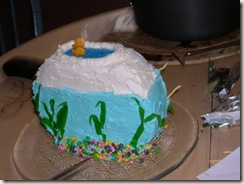
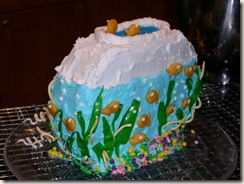
Fish Bowl Cake (with instructions)

DSCN1471

We made this cake for my youngest’s 4th Birthday. It is still one of our favorite cakes of all time and was loads of fun to make with the kids.

First we start with whatever basic cake you’d like to make. I will admit to cheating many times and I use box cakes often. I embellish them a bit to make them more flavourful though. Other items you need to pick up for this project are. Goldfish crackers, Fruit Rollups, Nerds Candies, and dry chow mein noodles, and buttercream icing.

Using a basic Vanilla cake I will add 1 pouch of Jello instant pudding (french vanilla), and substitute the water with buttermilk. The cakes come out a bit denser and very moist. Just follow the directions on the box with the above substitutions and addition.

Trace the bottom of two round 9” cake pans onto parchment paper and cut them out to line the bottom of the pans. be sure to grease the sides of the two pans. Divide the batter evenly into the two pans and bake as directed on the box.

When they are ready, remove from oven and let cool in the pan for 10 minutes. Flip them onto a wire rack and let them completely cool before icing.

DSCN1454

Prepare you icing using a buttercream icing. I used This recipe from Wilton's, for this cake. I prefer the buttercream used in the Vanilla Cupcake Recipe to be honest but either will work fine.

Divide the icing into two parts. Take 1/3 of the white icing out of the mixing bowl and place in a seperate bowl covering until ready to use. Place two drops of Spectra blue food colouring gel into the icing and mix until smooth in colour. Add extra colour until you get the desired shade you are looking for. (Alternatively you can use Wilton’s dye paste, but I prefer Spectra brand)

Once cooled, place cakes on a clean cutting board and slice the raised portion of each cake off to create a flat surface.

DSCN1459

Cut the cakes about 2 inches in on opposite sides of the circles. Place icing onto one cake, smooth it over and place the second cake on top. cut approximately two inches from one side of the cake and about an inch to inch and a half off the opposite side so you end up with something that looks like this.

DSCN1460 The Longer flat side will be the bottom and the shorter side the top. Spread icing along the longer “bottom” side and place upright onto a round smooth cake plate.

DSCN1461

Continue use the blue icing around the cake to end up with the above result. Take your white icing sugar and smooth over the remaining cake. Remember only to use a thin layer of both at this point. Place in the fridge for about 1/2 hour to cool. Once nice and cool, place a thicker layer of each icing colour in the appropriate locations. The first thin layer and cooling allows for a top coat of smooth icing avoiding those pesky crumbs on the top layer.

DSCN1462

Here is the top layers now. If you have an icing bag, Fill it with the remaining white icing. Without using any tip pipe a large round oval on the top of the cake to create the cake rim. Fill with blue sprinkle sugar. If you don’t have an icing bag place some of the white icing into one cut the corner to create the same effect.

Now comes the fun part. Take the fruit roll ups out and find the green ones. Cut shapes of seaweed out of the rollups. What I do is use a paring knife to make the shapes then peel them off as needed. The kids like this part. Place the seaweed around the cake wherever you feel like it.

DSCN1464

Continue embeleshing the cake until you achieve your desires results with seaweed. Use the nerds along the base for pebbles, Chow mein noodles for added affect (my brain is dead and can’t remember what seaweed the chow mein noodles represent).

DSCN1465

When you are happy with your base you can start adding goldfish. For extra fun we used a small tip in the icing bag and made eyes, air bubbles in the tank etc.

DSCN1467 DSCN1466

The finished fish bowl with some writing and such added to the plate.

DSCN1470

DSCN1471

There you go!! Get the kids involved (or not) and have fun with it.

Related Posts Plugin for WordPress, Blogger...