This is the Horde. Below are our Recipes. Thanks for sharing our Kitchen

Sunday, May 31, 2009

Vanilla Cupcakes - Cupcake of the Day

Vanilla is a wonderful essence. The scent can be so soothing and relaxing and the flavour of real vanilla is sheer delight.

I often purchase real vanilla pods when I can find them for a reasonable price. I use the seeds in homemade icecream and sometimes cupcakes. The empty pods can then be placed in a small airtight container with some sugar. The flavour of the vanilla will infuse the sugar and can be used for a refreshing change to your morning coffee.

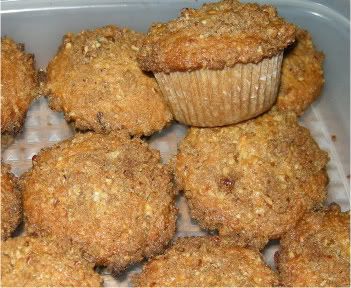
Today we have made traditional Vanilla Cupcakes. As usual I substitute milk for buttermilk. It's low fat and somehow, just makes baking taste better. Most of my recipes can use regular milk, but I will always specify that I have substituted the buttermilk in from the original recipe. You can make your own buttermilk. Take a cup of regular milk, add 1/2 tsp of lemon juice and mix it up. Leave it for about 5 minutes and that will do the job.


Ingredients:
1/2 cup of butter (or margarine)
2/3 cup of granulated sugar
3 large eggs
1 1/2 teaspoons pure Vanilla extract (the original recipe calls for 1 tsp. I like a stronger vanilla flavour)
1 1/2 cups all purpose flour (sifted)
1/4 teaspoon salt
1 1/2 teaspoons baking powder
1/4 cup buttermilk

Mix butter and sugar until a little fluffy. Add the eggs one at a time, mixing well between each egg addition. Continue to mix on med-high speed until fluffy. Add the buttermilk

In a seperate bowl combine the flour, baking powder and salt. Slowly add the flour until well combined. Scrape down the sides of the bowl and give it another little mix. The batter is quite thick.

Take a large spoon and drop into lined muffin cups. This recipe will yield exactly 12 average sized cupcakes. Fill the cupcake liners approx 2/3 of the way up.

Bake in a preheated oven at 350 degrees for approx 23-25 minutes. Check centers with a toothpick after 23 minutes. Remove from oven and let cupcakes cool completely on a baking rack prior to icing.

Buttercream Icing
1/2 cup butter (or butter flavoured Crisco if you desire)
2 cups of icing sugar (confectioners sugar)
1 tsp pure Vanilla
1-2 tablespoons cream (or milk)

Whip the butter and add 1/2 cup of icing sugar. Whip until well combined. Add the vanilla at this point and whip again, scraping the sides of the bowl. Add the remaining icing sugar 1/2 cup at a time (unless you want to end up with white powder all over your kitchen...ha ha), continuing until all the sugar has been added. Continue whipping for approximately one minute. Add the cream and whip again for about 2-3 minutes or until light and fluffy. You can add any food colouring gel to this recipe if desired. Today, teen son chose Lime Green for a colour.

Prepare your icing bag. If you don't have any icing bags use a sandwich bag or freezer bag and simple cut the corner (very small) for an impromptu round tip icing bag.

When the cupcakes are cooled pipe the icing onto the cupcakes any way you wish. This part is great fun for the kids if you want to get them involved in the project.

As mentioned above. I increase the vanilla ration on this one. I also will try this using some seeds from a vanilla pod next time I think and drop the measurement back down to 1 tsp.

It was vanilla day here as we also made Vanilla frozen Yogurt. I pretty much used up all my vanilla pods on that one. The Frozen Yogurt turned out fabulously. It was the first time we made that recipe from "125 Best Ice Cream Recipes" by Marilyn Linton and Tanya Linton. Many of the recipes in there I use as a base but change up the ingredients for more flavourful icecream. We have a Kitchenaid Ice Cream maker bought at (you guessed it), Golda's Kitchens. It's a pretty good machine all things considered for home use.

Saturday, May 30, 2009

Apple and Oat Crumble Top Muffins


Oat and Apple Crumble-Top Muffins
By Rheanna Kish and The Canadian Living Test Kitchen

These are like apple pie for breakfast, only they're justifiable! Freeze a batch for a good start to any day of the week.
Servings: 12 muffins


Ingredients:
1 cup (250 mL) all-purpose flour
3/4 cup (175 mL)whole wheat flour
3/4 cup (175 mL) quick-cooking rolled oats
1-3/4 tsp (9 mL) baking powder
1 tsp (5 mL) cinnamon
3/4 tsp (4 mL) baking soda
1/4 tsp (1 mL) salt
3/4 cup (175 mL) buttermilk (substituted for regular milk)
3/4 cup (175 mL) vegetable oil
1 egg
2/3 cup (150 mL) packed brown sugar
1 tsp (5 mL)vanilla
1 large apple, peeled, cored and diced

Topping:
1/3 cup (75 mL) packed brown sugar
1/3 cup (75 mL) chopped pecans
1/4 cup (50 mL) whole wheat flour
2 tbsp (25 mL) butter, melted
1 tsp (5 mL) cinnamon

Preparation:
Topping: In bowl, stir sugar, pecans, flour, butter and cinnamon; set aside. In large bowl, whisk all-purpose and whole wheat flours, oats, baking powder, cinnamon, baking soda and salt. In separate bowl, whisk milk, oil, egg, sugar and vanilla; pour over dry ingredients. Sprinkle with apple; stir just to blend.Fill paper-lined or greased muffin cups three-quarters full. Sprinkle with topping. Bake in centre of 375°F (190°C) oven for 25 minutes or until tops are firm to the touch. Let cool in pan on rack for 5 minutes. Remove to rack to let cool completely. (Make-ahead: Store in airtight container for up to 2 days or wrap individually in plastic wrap and freeze in airtight container for up to 2 weeks.)


source: Canadian Living Magazine, November 2007


I tried these over the winter and they were absolutely delicious. The crunchy crumble on the top is a perfect finish to a moist, comforting muffin. If you enjoy apple crisp and apple pie, this recipe is a must.

Friday, May 29, 2009

Red Velvet Cake

I have always been fascinated by this cake, but never tried one..or even tasted one. I have no idea if it's supposed to taste like I made it but it was darned good!!!


Red Velvet Cake:

· 2 1/2 cups (250 grams) sifted cake flour
· 1/2 teaspoon salt
· 2 tablespoon (15 grams) cocoa powder (Dutch processed is preferred but I use regular too)
· 1/2 cup (113 grams) unsalted butter, at room temperature
· 1 1/2 cups (300 grams) granulated white sugar
· 2 large eggs
· 1 teaspoon pure vanilla extract
· 1 cup (240 ml) buttermilk
· 1 tsp of Spectrum Super Red Gel Food colouring. (you can substitute Wiltons dye pastes, or about 2 tablespoons of red food colouring from the grocer)
· 1 teaspoon white distilled vinegar
· 1 teaspoon baking soda
Preheat oven to 350 degrees F (175 degrees C) and place rack in center of oven. Line two 9 inch round pans with Parchment paper, or make sure you generously butter/flour the bottom of the pan. Personally I always use Parchment paper.


In a bowl sift together the flour, salt, and cocoa powder. Set aside.


In bowl an electric mixer, or hand mixer, beat the butter until soft (about 1 minute). Add the sugar and beat until light and fluffy (about 2-3 minutes). Add the eggs, one at a time, beating well after each addition. Scrape down the sides of the bowl. Add the vanilla extract and beat until combined.


In a measuring cup whisk the buttermilk with the red food coloring. With the mixer on low speed, alternately add the flour mixture and buttermilk, in three additions, beginning and ending with the flour.


In a small cup combine the vinegar and baking soda. Allow the mixture to fizz and then quickly fold into the cake batter.


Working quickly divide the batter evenly between the two prepared pans and smooth the tops with a spatula or the back of a spoon. Bake in the preheated oven for approximately 25 - 30 minutes, or until a toothpick inserted in the center of the cakes comes out clean.


Cool the cakes in their pans on a wire rack for 10 minutes. Place a wire rack on top of the cake pan and invert, lifting off the pan. Once the cakes have completely cooled, wrap in plastic and place the cake layers in the fridge for a couple of hours or in the freezer for about ½ hour. This helps when applying the frosting to avoid crumbs. Alternatively you can apply a thin layer of icing then refrigerate and continue frosting over the cool icing.


Cream Cheese Icing.
· ½ tsp vanilla extract
· 2 blocks Philidelphia Cream Cheese (don’t even think about buying low fat version)
· ½ cup butter softened
· approx 2 cups icing sugar. (you need to play with this one a bit to get to your desired consistency)
· ¼ tsp salt
· 1 ½ cups whipping cream
Whip the whipping cream until firm peaks appear. Place into a separate bowl.
Beat cream cheese, butter, salt, together for about a minute. Add the confectioner’s sugar slowly until nice and smooth and the vanilla near the end. Fold the whip cream into the cheese mixture until combined.


To assemble the cake you have a couple of options. You can use a large bread knife and cut the two layers into four and layer the cake that way or you can simply ice both layers as is. It really depends on how you want to present it. Personally? We use just the two layers. Perhaps if we were entertaining I might make it a thinner four layer cake but we enjoy it as seen in the photo.
Be generous with the icing.


This cake is lovely. I wasn’t sure what to expect the first time I made it. I tweaked a few things and as always substitute buttermilk for regular milk. I just find it makes a richer cake. I’ve always heard of this Red Velvet cake but had never tried it. My family really likes it. I hope you do too. It’s a light tasting chocolate, and very moist.

Pizza Scones, for lunch variety

Pizza scones are awesome!! the kids love them in lunches. Sometimes I change it up and use ham and cheese. Pizza scone recipe. (any scone...add your own meats/cheeses)

Easy and low fat
1 1/2 cup whole wheat flour
1/2 cup white flour
1 tablespoon baking powder
2 teaspoons sugar
3 tablespoons margarine/butter
3/4 cup buttermilk
2 large egg whites
about 1 cup or so of cut up pepperoni, not in slices but cubed from the slices
about the same of shredded mozzarella cheese
pizza sauce
So..mix all the dry ingredients together. Add the butter and mix it so it's kinda cornmealish. Combine the buttermilk and egg whites together and add it to the dry mixture. Add the pepperoni and cheese and mix again. On a pastry board or whatever, Put down some flour, take the dough out and knead it a couple of times (about 4 times). Make sure it's lightly covered in dough.

Shape it into a flat round circle and cut it into triangles but don't seperate the pieces (bake it as a circle)
Spray a cookie sheet with Pam and slide it onto sheet (or cut it into triangles on the sheet)Brush pizza sauce over the top (not too much) and bake at 400 degrees for 20 minutes.
Yummy, moist.
When you pull it out of the oven, cool it on a cooling rack and seperate the pieces. I just bag em up when they are cooled toss them in the fridge and they are ready to grab for lunches. I usually make a couple of batches and freeze some too for emergencies.
Takes about 1/2 hour from start to finish and I'll often whip up some in the morning as the masses are showering for school.

You can mix it up a bit by omitting the pizza sauce and using ham and cheese, or other ingredients to your liking.

Home Made Bread


Can anything be better than the smell of freshly baked bread? I'm not sure, a few things come to mind like Chocolate Chip Cookies (recipe below this one) perhaps, but there is something about the smell of fresh bread. It sucks you in and makes you feel all warm and cozy.

We make our bread daily. I bought a Zojirushi breadmaker well over 6 years ago now and have used it like no other appliance in the house. Not an inexpensive investment at nearly $400 Canadian but well worth every penny. It owes me nothing and I think will outlast my poor decrepid van. Once again, this was bought at GoldasKitchens. (I think their ad is floating about my blog somewhere...it's my alltime favorite kitchen store and the brick and mortar one is only a few minutes from me)

The task of dough making goes to our soon to be 14 year old Cameron. It's a trade off. We save money by making it ourselves and since he is the one making it everyday now I pay for his cell phone. I think that's fair.

I have played with different recipes in the breadmaker for a long time but found this one works the best. It's soft, and perfect for sandwiches, shaping into buns etc. I use it as a base for my family famous cinnamon buns (move over Cinnabon). It's very versatile. Sometimes we make sandwich buns instead of bread. This is the recipe I use to make hamburger buns as well.

Here it is: Sour Cream Bread/Bun recipe

Main
1/2 cup water
1/2 cup sour cream
1 tsp salt
2 tbsp sugar
2 3/4 all purpose flour
2 1/2 tsp bread machine fast rising yeast
1 slightly beaten egg

Optional
sesame seeds
1 large egg (optional) ..but damned good

Add the first seven ingredients in order to the bread machine. Put on dough cycle. (I use quick dough cycle...45 minutes). Remove from machine.

From here, we flour the surface of our large wooden board and divide the dough in half. Placing each loaf in a seperate loaf pan lined with parchment paper (Lining it with parchment is very important as this one will stick. If you forget the parchment paper, you can use "Pam", but be prepared to leave the bread to cool completely in the pan before trying to remove it). I find using parchment paper the best as you can immediately remove the finished loaves onto a cooling rack and dig in!!

The loaves are now split into the two pans, cover with a tea towel and let rise for about 45 minutes or so, checking on them periodically to ensure they aren't getting too big. I usually set the oven at 425 at this point, put the loaves on the stove and cover them. The heat from the oven will help them rise faster.

Once risen, bake at 425 for 12 minutes and remove. If you like prior to rising you can brush on the optional scrambled egg with a pastry brush and sprinkle with sesame seeds.

For buns: Again, remove the dough from the machine and place on a floured surface. Roll the dough into a log shape and cut the dough into rounds approx 1 inch thick. Shape them into a bun shape and place on a cookie sheet lined with parchment paper. (You may need two sheets but generally I get about 12 buns and fit them on one). You can brush on the egg and sesame at this point if you like. Again, cover with a clean tea towel on top of the stove and let rise for about 45 minutes.

Pop them into the oven after rising for 12 minutes at 425 and there you are. Fantastic sandwich buns.

The World's BEST Chocolate Chip Cookie Recipe


Hands down, this one is perfection!! We mix it up a little bit sometimes and add skor bits in with pecans, or, white chocolate chips and macadamia nuts but any incarnation of this cookie will be one to pass on to generations.

Yes, it is that good!! It's basically not too different than any other standard chocolate chip cookie recipe but I added a little cream to it one day and Voila!!! Chewy melt in your mouth heaven

Chocolate chip cookies

Chewy and just friggen Awesome!!!
Chewy chocolate chip cookie recipe

1 1/3 cup butter
1 cup sugar
1 cup brown sugar packed
2 large eggs
2 tsp vanilla
2 tbsp cream (coffee cream, or whipping cream)

Cream butter and sugars together then add remaining liquid ingrediants. Mix them up well.

Add...

1 tsp soda
2/3 tsp salt
3 cups flour

1 cup nuts (optional)
1 pkg chocolate chips (or whatever).

Lightly grease cookie sheet, bake at 375 degrees. 1st batch approx 8 minutes following batches approx 6-7 minutes (depends how big you make the cookie). The centers will be chewy. Drop the cookie dough onto the pan with a spoon so the dough is approx. 1 1/2 inches in diameter. This yields approximately 36 cookies. (I use a cookie scoop to shape the cookies. It's like an ice cream scooper but smaller)

These are Totally melt in your mouth cookies!!!

Thursday, May 28, 2009

Traditional Devon Cream. Homemade Buttermilk Scones. A little bit of heaven on Earth


Whilst some of you know, many do not, I temporarily lived in England before my oldest was born. I had visited several times in my teens as well. Everytime I step off the plane in London I feel like I'm home. I feel so connected to Wales courtesy of stories from my beloved Grandfather of his youth.

One of my most favorite things in the world is teatime. Wafer thin cucumber sandwiches, tea and scones with cream and jam. Oh be still my heart.

The last time I had a traditional tea time snack was one evening staying at the Four Seasons hotel. I pampered myself, ordered traditional teatime fair, and a fabulous bottle of french wine. I indulged in the luxury of the room and savoured the flavours of my memories. I have yet to have found imported devon cream anywhere except one shop very very far away.

Saturday???? I FOUND IT!!! Our local grocer has started to import it. Bless his heart. Here I was calculating how much I could save if I bought no name vs brand name, penny pinching my normal modus operandi in the grocery store and there it was!!!! SCREW the budget...I was getting my real, Devon Double Cream....:heart: I have been making "mock" devon cream for several years now...it just doesn't compare.

Today I made some scrumptous buttermilk scones, put a little dollop of cream on and some strawberry jam. I went out to my backyard in the shining sun and pretended I was in my favorite park in Bath and just enjoyed both the flavours and the memories as they came through me. Silly sometimes what makes us feel good. It's been 6 years since I've been back to England and am now yearning to return.

I have an excellent Scone Recipe that I will share. They are fabulous. I am indulging in my lovely Devon Double Cream at the moment but there is also a recipe for Mock Devonshire Cream included. (although it pales in comparison to the real thing it's not bad)

BUTTERMILK SCONES

1 1/2 cups all-purpose flour
2 Tbl sugar
1 1/4 tsp baking powder
1/4 tsp baking soda
1/2 tsp salt
6 Tbl cold butter (3/4 of a stick) cut into small pieces
1/2 cup buttermilk
2 Tbl sweet milk

Sift together flour, sugar, baking powder, baking soda and salt into a large mixing bowl. Add butter pieces to dry ingredients. Using a pastry blender or two dinner knives, cut butter into flour until the mixture takes on the size of small peas. Make a well in the center of mixture. Pour buttermilk into the well. Using a fork, pull the mixture into the buttermilk to form a soft dough. Turn out dough onto a floured surface. Knead gently. Cut into shapes using biscuit cutter or heart-shaped cookie cutter. Brush tops with sweet milk and bake at 425 for 12 min or until lightly browned. Yield: 8 scones, approx. 2 1/2" in diameter Recipe can be doubled.

Variations:
1) Sprinkle tops with cinnamon sugar after brusing with milk
2) Add 1/2 tsp grated orange peel to dry ingredients.
3) Add 6 Tbl currants to dry ingredients.

I like my Mock Devonshire Cream made with less granulated sugar for the same reason. I also make my Mock Devonshire Cream with less cream so it will have more of a spreading consistency rather than being so much like plain ol' whipped cream. I have also found that making it this way eliminates the need to whip the cream again just before serving.

Here's my recipe for Mock Devonshire Cream:
1 3 oz pkg cream cheese, softened
1/2 Tbl sugar
dash salt
1/4 to 1/3 cup whipping cream

In a medium-sized bowl, beat the cream cheese on high speed of an electric mixer until smooth. Add the sugar and salt. Gradually add the whipping cream and continue beating until mixture is stiff. Store in refrigerator.You could also try adding 1/4 tsp vanilla extract to that recipe for Mock Devonshire Cream.


Montreal Style Bagels

Sunday Morning is our traditional big breakfast day. My eldest niece (and goddaughter) asked if I'd teach her how to make bagels. My three neices were visiting us this weekend. The two of us got up early and I brought her through the steps of Montreal Style bagels. It was fantastic. She was a great little helper and was totally into it. We made a feast of fresh bagels, cream cheese, sliced fruits, and some cold cuts and scrambled eggs.


Montreal Style Bagel recipe and instructions:

I found this recipe on the web in a nostalgic mood for Montreal style bagels. I first was introduced to them in University, got spoiled and have never eaten another style of bagel since. There are no places I can get them locally so I went on a hunt. I tried this recipe out and first time out they were fabulous!!! Easy to make, especially if you use a breadmaker on dough cycle (mine is programmable), but easy by hand as well. I made some minor adjustments and here it is. This is imported from my recipe collection at BigOven.com


Ingredients
1 1/2 cups Water warmed
5 tablespoons
Sugar
3 tablespoons
Canola Oil
1 package Dry
yeast 8grams
1 small
Egg beaten
1 tablespoon Malt drink powder or syrup
4 1/2 cups
Unbleached flour You may need a little more (you can use all purpose flour as well
1 teaspoon
Kosher Salt (or regular salt)
1/2 cup Poppy seed or
sesame seeds
6 quarts Water
1/3 cup
Honey


Instructions
1, In a large bowl stir together the warm water, sugar, canola oil, yeast (not instant), egg and malt: Keep combining until the yeast dissolves. Then, stir in salt and one cup of the flour.
2. Gently add enough flour to make a soft dough, about 3 cups
3. Knead your dough for 10-12 minutes, stirring in extra flour as you need it. When your dough is firm and smooth, cover with inverted bowl and let sit 10 minutes.
4. Divide the dough into 12 equal parts. Roll each piece into a 10 inch rope, then curve each one pressing together ends to make a bagel shape. You may need to use a few drops of water to help the ends stay together.
5. let bagels rise for 30 minutes
6. When ready, fill a large pot with the 6 quarts of water and stir in the honey. Bring that to a boil.
7. Preheat oven to 425 degrees F and line two baking sheets with parchment paper
8. When the honey water has come to a boil, drop the bagels in (four at a time), and let boil for 90 seconds, flipping once at 45 seconds. Remove and pat dry on clean tea towels
9. Sprinkle the bagels with sesame seeds or poppy seeds, generously covering both sides. Place on parchement paper.
10: Bake at 425 for 8 minutes, then flip and bake another 8 minutes. This is really going to depend on your oven temperature. The recipe originally called for 10 minutes per side but I was watching them and they were heading near burn mode by 8 minutes. After flipping they only had to bake for approx 5 minutes. Watch them first time through to ensure even baking.
These were really terrific. My family gobbled them up like lunatics. I was surprised how easy they actually were to make. When I ran the nutritional numbers they were a little off my original recipe which measured Cholesterol at only 1% (5mg), Sodium 6%, 163 mg; Potassium 122 mg, 3%, the calorie count was bang on but the other measurements differed
.

Wonderful memories are made by impromptu visits, and spontaneous fun. I loved having the girls here and welcome a crazy house anytime. Here are pics of my lovely goddaughter helping with the bagel making. I hope she treasures the memory when she gets older as I do.

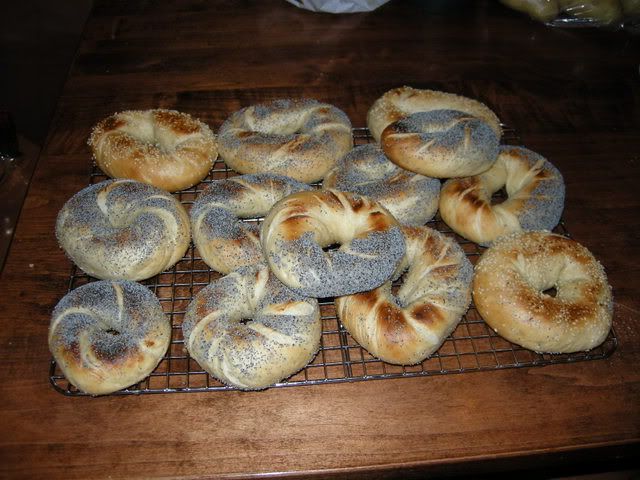
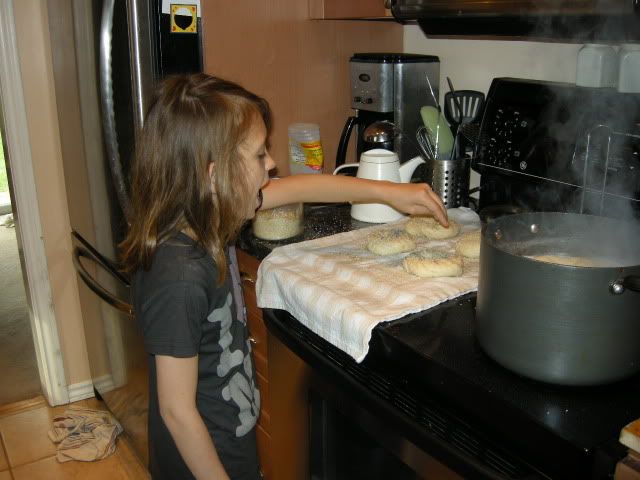
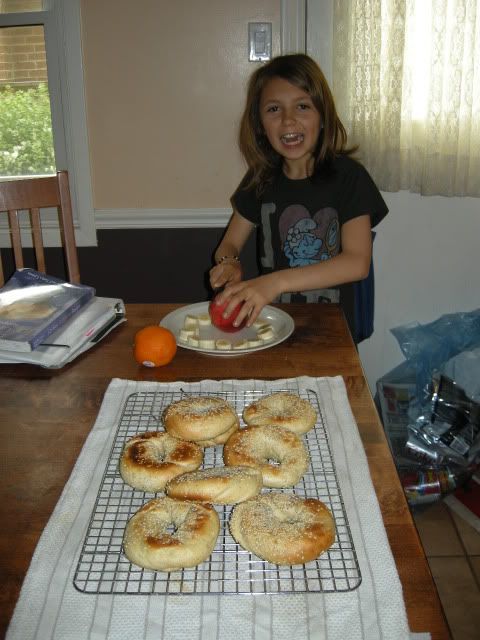
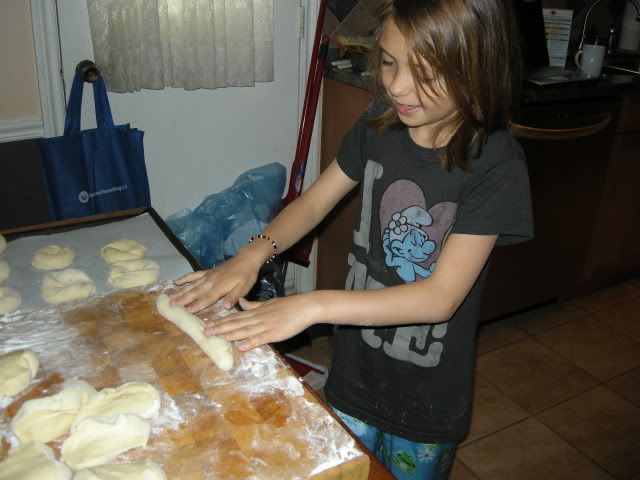
Making the bagel shapes


Spreading the sesame and poppy seeds


Making her fruit tray to go with the first batch of bagels out of the oven.
Recipe originally posted in my Bigoven account

Montreal Bagels

How to make a LadyBug Cake

We made this cake for my Daughter's 8th Birthday. Her class had just finished a rousing performance of "Going Buggy" and she was the kidnapped Ladybug. She wowed her dad and I (who thought she was tone deaf to be honest) with a spectacular solo, belting out "that's no way to treat a ladybug" complete with the required "Don't mess with this gal" attitude. She brought tears to my eyes, not only in pride but also because I forgot the video camera...I have "part" of her performance thanks to a neighbour.

In honour of this we decided on a ladybug cake for her class. It was a hit and was really quite simple to make

Okay...here ya go. HAVE FUN!!!!!

The icing is just a simple buttercream. 1/2 cup butter, 1/2 cup shortening, 4 cups of icing sugar, 1 tsp vanilla. Whip the butter, shortening, add one cup of icing sugar, whip again, add vanilla, whip, add icing sugar one cup at a time. Add a tablespoon of milk at a time to get a good consistency. I also add about 2 tblsp of clear corn syrop to help with consistency before adding the milk.


9 x 13 pan for leaf

Pans for the round body of ladybug (ended up with an extra one...the kids enjoyed it)

Baking (please ignore the dirty oven). Most of the pans I use are Wilton's and my favorite Baking Store...Golda's Kitchens.


Leaf cut out and iced. TIP: You can do two things to avoid the crumbs in the icing.

One: do a thin layer of icing with crumbs in it. Put in fridge for awhile until it gets harder then ice on top of it
Two: Take a jar of apricot or apple JELLY (not jam), nuke it until it's liquidy and brush it over the cakes. Let cool for about 1/2 hour in the fridge and you'll get no crumbs. It also helps to adhere the icing to the cake


Photobucket

Ladybug body done. Transfer onto leaf with a spatula

Photobucket

Body added. I made the head with an extra piece of cake, iced it and added. I filled in spots I missed with icing from a bag to avoid crumbs


Photobucket

Polka dots and such added with an icing bag. (if you don't have one you can always use a ziploc bag and cut a very small hole in the corner to make a tip.

Photobucket

Final embellishments. Little lady bugs made of marshmallow fondant. I'll type up the recipe for you. (easy peasy and it tastes like the inside of an oreo cookie) These are stuck on with toothpicks


For Fondant icing.
This one is a little trickier but after you make it once it's pretty easy. It molds like playdoh and rolls out super thin. It's paintable with food colouring and the possibilities are endless.

Here is the recipe I use. THis is a copy of a post in a cake decorating forum that I go to for ideas. Bunnywoman was the originator of this recipe.
The recipe is as follows:

Marshmallow fondant
1 cup mini marshmallows
1 tbsp water
1 1/2- 1 3/4 cup powder sugar

Place marshmallows in a standard 1 cup measuring cup and push down and pack them in. Place in a microwave safe bowl and add the water. Put in the microwave for about 20 seconds. Just long enough for them to soften and puff up. Take out and stir with a spoon until it is combined well. At this point it looks kind of soupy. Then add the sugar and mix and fold until all is incorporated and it is no longer sticky. I take it out of the bowl when it gets to the point where most of the sugar is incorporated and I knead it in my hands. This takes roughly about 5-7 minutes. Take a fondant roller or a regular rolling pin and roll out just as you would Wilton's fondant. You can get this fondant almost paper thin and it also repairs well. It's cheap, easy to work with, and tastes great too.

You can make a large batch of this fondant as well by doing this:

Large batch of Marshmallow fondant
1- 16 oz bag of mini marshmallows
2 tbsps water
2 lbs powdered sugar (8 cups)

Do the same procedure as above.


Tips for success from Bunny:
I add any flavor Lorann Oil flavorings to this. Something that will compliment my cake well. What I do is cut back on the water and add about 1/8 tsp Lorann flavoring. You can certainly add more (especially if I make the large batch) for a more of a pungent flavor, just adjust the water amount accordingly. *****The more liquid you add to this will make it stickier to work with. Try to be accurate in measuring the liquid.*****

Stickiness??????
If it is way to sticky to work with then cut back on the amount of liquid that you used by about 1/2 tsp. This will help.
Let it sit out and "air dry" for about 10 minutes.
Use a small amount of Crisco on your work surface and hands. A little goes a very long ways so don't go over board with the Crisco.

Knead the dough with a spoon!!!!! Do not attempt to pick it up and knead it too soon. This dough is hot when comes right out of the microwave!!!!! I say this because I have had people contact me saying they received a burn from it. I can almost knead it fully with a spoon.

Dough that is not in use must stay covered with plastic wrap or it will dry out. Or place it in a Ziploc bag. That works too.

Dried out Marshmallow fondant: place it back into the microwave and nuke it for a few seconds to revive it back to its original state. The bigger the batch the more time on the microwave. Example: small batch 3-5 seconds.......large batch about 10 seconds. Microwaves vary too so keep that in mind.

Coloring: well I have experimented with this several different ways. If I want to make the whole batch of Marshmallow fondant one color then I have added the color, just Wilton paste color, Americolors, or Chefmaster colors.....any will work for this, when I pull the bowl out of the microwave when it looks "soupy". Stirred it up and then added the powdered sugar. Otherwise I have added it after it has come together and kneaded it in by hand. I use plastic gloves too when I do this, because otherwise your hands are never the same!!!!

You can work with this just as you would the regular fondant. Pizza rollers cut this very well. Ribbon cutters work fabulous too for this. I can make bows and drapes, push molds etc with this. I love the taste of this stuff. Great on the pocketbook too!!!!!!


Happy Decorating!

OH...wanted to add...for the marshmallow fondant. I made the last batch using the kitchenaid mixer to get it mostly mixed then kneaded it until smooth. Worked like a charm.

I will confess sometimes I cheat and use boxed cakes. I substitute Buttermilk for water in all box recipes

The Beginning

We live in the kitchen in our house. I vowed when my boys were born that they would learn how to cook and bake and be able to fend for themselves in a pinch.

Over the years the kids have always been in the kitchen with me. We have a biannual Perogy making day where all of the kids have a little job on the assembly line. My beloved Gran used to make them and taught me. I wish to pass this on.

The older boys have daily tasks in the kitchen to cover their cell phone bills. I figure with the money we are saving by making everything from scratch we can trade off the cell phone bills.

My 14 year old makes bread dough daily and gets them into the loaf pans to rise. My oldest makes treats for lunches and occasionally takes care of dinner. The little ones just love helping out.

I hope you enjoy these recipes and please let me know how you make out with them if you try them.

Monday, May 4, 2009

Privacy Policy

Privacy Policy for feedingtheravenoushorde.blogspot.com
The privacy of our visitors to feedingtheravenoushorde.blogspot.com is important to us.
At feedingtheravenoushorde.blogspot.com, we recognize that privacy of your personal information is important. Here is information on what types of personal information we receive and collect when you use and visit creativekidscakesflife.blogspot.com, and how we safeguard your information. We never sell your personal information to third parties.
Log Files
As with most other websites, we collect and use the data contained in log files. The information in the log files include your IP (internet protocol) address, your ISP (internet service provider, such as AOL or Shaw Cable), the browser you used to visit our site (such as Internet Explorer or Firefox), the time you visited our site and which pages you visited throughout our site.

Cookies and Web Beacons
We do use cookies to store information, such as your personal preferences when you visit our site. This could include only showing you a popup once in your visit, or the ability to login to some of our features, such as forums.
We also use third party advertisements on creativekidscakeslife.blogspot.com to support our site. Some of these advertisers may use technology such as cookies and web beacons when they advertise on our site, which will also send these advertisers (such as Google through the Google AdSense program) information including your IP address, your ISP , the browser you used to visit our site, and in some cases, whether you have Flash installed. This is generally used for geotargeting purposes (showing New York real estate ads to someone in New York, for example) or showing certain ads based on specific sites visited (such as showing cooking ads to someone who frequents cooking sites).
DoubleClick DART cookiesWe also may use DART cookies for ad serving through Google’s DoubleClick, which places a cookie on your computer when you are browsing the web and visit a site using DoubleClick advertising (including some Google AdSense advertisements). This cookie is used to serve ads specific to you and your interests (”interest based targeting”). The ads served will be targeted based on your previous browsing history (For example, if you have been viewing sites about visiting Las Vegas, you may see Las Vegas hotel advertisements when viewing a non-related site, such as on a site about hockey). DART uses “non personally identifiable information”. It does NOT track personal information about you, such as your name, email address, physical address, telephone number, social security numbers, bank account numbers or credit card numbers. You can opt-out of this ad serving on all sites using this advertising by visiting http://www.doubleclick.com/privacy/dart_adserving.aspx
You can choose to disable or selectively turn off our cookies or third-party cookies in your browser settings, or by managing preferences in programs such as Norton Internet Security. However, this can affect how you are able to interact with our site as well as other websites. This could include the inability to login to services or programs, such as logging into forums or accounts.
Deleting cookies does not mean you are permanently opted out of any advertising program. Unless you have settings that disallow cookies, the next time you visit a site running the advertisements, a new cookie will be added.
AdSense Privacy Policy Provided by JenSense
Related Posts Plugin for WordPress, Blogger...