I have to tell all my readers. I saw this in the Better Homes and Gardens magazine and just HAD to try them. I love Red Velvet cake and have a recipe posted for it Here . I thought...Wow, these would make fabulous cookie gifts sure to wow if they tasted as good as they looked. I can say, Indeed they do!!
The end result is a cakey type cookie with a delicious filling. Vibrant red (even though my picture may not reflect that).
Without further adieu. The directions.
Ingredients
1/2 cup butter, softened
1 cup packed brown sugar
2 tablespoons unsweetened cocoa powder
1/2 tsp salt
1 egg
1 tsp vanilla
2 cups all purpose flour
1/2 cup buttermilk
2 tablespoons red food colouring (I use Spectre gel)
Peppermint and Cream Cheese Filling (recipe below)
Preheat oven to 375 F. Line cookie sheets with parchment paper, set aside. In a large bowl beat the butter for 30 seconds, add the brown sugar, baking powder, cocoa, and salt. Beat until well combined. Add the egg and vanilla, scraping the sides occasionally until combined. Alternately add flour and buttermilk, beating on low speed after each addition just until combined. Stir in the red food colouring.
Spoon dough from a rounded teaspoon (I used cookie scoops...like ice cream scoops) onto the cookie sheets approx 2 inches apart. Bake in the preheated oven for 7-9 minutes or until the edges are set. Cool on cookie sheet for two minutes then remove to wire rack and let cool.
Spread Peppermint Cream cheese filling on the flat side of a cookie. Top with remaining cookies, flat side down pressing very lightly together.
If desired sprinkle with crushed candy canes. ( I sprinkled the candy canes on half of them while they were just out of the oven to ensure they held.
Peppermint Cream Cheese Filling
In a large bowl, combine two 3 oz packages cream cheese, softened, with 3 tablespoons of butter. Beat on medium to high speed until light and fluffy. Add 1 tsp of Peppermint extract. Gradually,beat in 3 cups powdered sugar. Add milk (I use whipping cream because I find it whips better), I tsp at a time to make a filling of spreading consistency.
To store: Layer cookies between sheets of waxed paper in an airtight container, cover. Store in the fridge for up to 3 days. Let cookies stand at room temp for 15 minutes before serving.
10 fingers and toes up for this one!!!! They are tasty and look delightful!
Feeding a full house can be a challenge. Four very busy Canadian kids digging in and helping mom in the kitchen. The Pictures aren't perfect. The kitchen a little messy but the food is real and made with love! Hopefully I will foster in my kids below a love of good food, a healthy lifestyle and a love of life. Join us for some fun
This is the Horde. Below are our Recipes. Thanks for sharing our Kitchen
Showing posts with label Red Velvet Cake Recipe. Show all posts
Friday, December 4, 2009
Friday, May 29, 2009
Red Velvet Cake
I have always been fascinated by this cake, but never tried one..or even tasted one. I have no idea if it's supposed to taste like I made it but it was darned good!!!Red Velvet Cake:
· 2 1/2 cups (250 grams) sifted cake flour
· 1/2 teaspoon salt
· 2 tablespoon (15 grams) cocoa powder (Dutch processed is preferred but I use regular too)
· 1/2 cup (113 grams) unsalted butter, at room temperature
· 1 1/2 cups (300 grams) granulated white sugar
· 2 large eggs
· 1 teaspoon pure vanilla extract
· 1 cup (240 ml) buttermilk
· 1 tsp of Spectrum Super Red Gel Food colouring. (you can substitute Wiltons dye pastes, or about 2 tablespoons of red food colouring from the grocer)
· 1 teaspoon white distilled vinegar
· 1 teaspoon baking soda
Preheat oven to 350 degrees F (175 degrees C) and place rack in center of oven. Line two 9 inch round pans with Parchment paper, or make sure you generously butter/flour the bottom of the pan. Personally I always use Parchment paper.
In a bowl sift together the flour, salt, and cocoa powder. Set aside.
In bowl an electric mixer, or hand mixer, beat the butter until soft (about 1 minute). Add the sugar and beat until light and fluffy (about 2-3 minutes). Add the eggs, one at a time, beating well after each addition. Scrape down the sides of the bowl. Add the vanilla extract and beat until combined.
In a measuring cup whisk the buttermilk with the red food coloring. With the mixer on low speed, alternately add the flour mixture and buttermilk, in three additions, beginning and ending with the flour.
In a small cup combine the vinegar and baking soda. Allow the mixture to fizz and then quickly fold into the cake batter.
Working quickly divide the batter evenly between the two prepared pans and smooth the tops with a spatula or the back of a spoon. Bake in the preheated oven for approximately 25 - 30 minutes, or until a toothpick inserted in the center of the cakes comes out clean.
Cool the cakes in their pans on a wire rack for 10 minutes. Place a wire rack on top of the cake pan and invert, lifting off the pan. Once the cakes have completely cooled, wrap in plastic and place the cake layers in the fridge for a couple of hours or in the freezer for about ½ hour. This helps when applying the frosting to avoid crumbs. Alternatively you can apply a thin layer of icing then refrigerate and continue frosting over the cool icing.
Cream Cheese Icing.
· ½ tsp vanilla extract
· 2 blocks Philidelphia Cream Cheese (don’t even think about buying low fat version)
· ½ cup butter softened
· approx 2 cups icing sugar. (you need to play with this one a bit to get to your desired consistency)
· ¼ tsp salt
· 1 ½ cups whipping cream
Whip the whipping cream until firm peaks appear. Place into a separate bowl.
Beat cream cheese, butter, salt, together for about a minute. Add the confectioner’s sugar slowly until nice and smooth and the vanilla near the end. Fold the whip cream into the cheese mixture until combined.
Cream Cheese Icing.
· ½ tsp vanilla extract
· 2 blocks Philidelphia Cream Cheese (don’t even think about buying low fat version)
· ½ cup butter softened
· approx 2 cups icing sugar. (you need to play with this one a bit to get to your desired consistency)
· ¼ tsp salt
· 1 ½ cups whipping cream
Whip the whipping cream until firm peaks appear. Place into a separate bowl.
Beat cream cheese, butter, salt, together for about a minute. Add the confectioner’s sugar slowly until nice and smooth and the vanilla near the end. Fold the whip cream into the cheese mixture until combined.
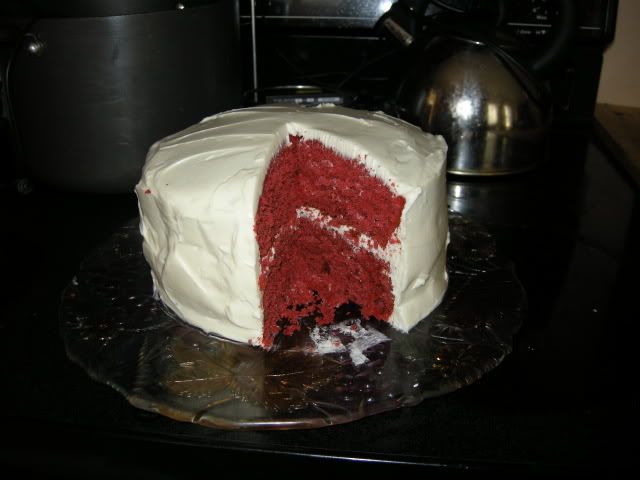
To assemble the cake you have a couple of options. You can use a large bread knife and cut the two layers into four and layer the cake that way or you can simply ice both layers as is. It really depends on how you want to present it. Personally? We use just the two layers. Perhaps if we were entertaining I might make it a thinner four layer cake but we enjoy it as seen in the photo.
Be generous with the icing.
This cake is lovely. I wasn’t sure what to expect the first time I made it. I tweaked a few things and as always substitute buttermilk for regular milk. I just find it makes a richer cake. I’ve always heard of this Red Velvet cake but had never tried it. My family really likes it. I hope you do too. It’s a light tasting chocolate, and very moist.
Subscribe to:
Posts (Atom)